Coxinha, a beloved Brazilian street food, is a culinary masterpiece disguised as a simple fried chicken croquette. Its irresistible allure lies in the perfect harmony of textures and flavors: a tender, succulent chicken filling enveloped in a flawlessly crisp, golden-brown dough. This iconic snack boasts a unique history, evolving from a whimsical resemblance to a chicken leg (coxinha in Portuguese means "little thigh"). From bustling city streets to sophisticated gatherings, coxinha consistently delivers a satisfying bite. The rich, savory filling contrasts beautifully with the light, airy dough, creating a truly unforgettable gustatory experience.
This classic recipe simplifies the seemingly complex process, guiding you through each step with ease and clarity. Forget the intimidation; making perfect coxinha is more achievable than you think! Ready to embark on a culinary adventure and create these delectable treats? Let's dive into the step-by-step instructions below to master the art of coxinha-making.
Tools Needed
- Large Cast Iron Skillet
- Cast Iron Pot
- Heavy Pot for Deep Frying
Ingredients
- Chicken
- Salt
- Pepper
- Garlic Powder
- Onion: 1
- Garlic: 6 cloves
- Tomato Paste
- Ground Cumin
- Parsley
- Chicken Broth: 6 cups
- Flour: 6 cups
- Breadcrumbs
- Eggs: 3
- Cooking Oil
Step-by-Step Instructions
Step 1. Prepare the Chicken Filling
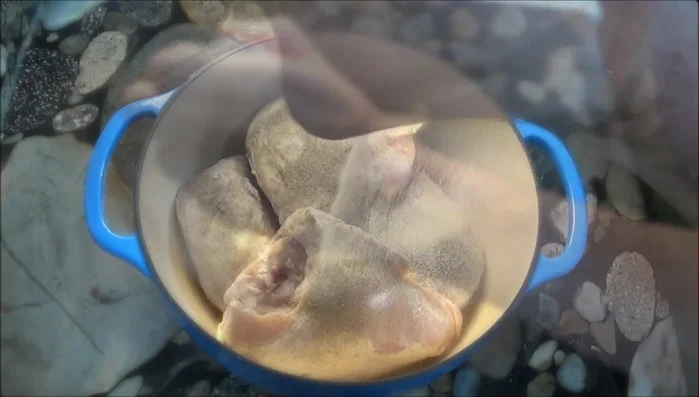
- Slow cook chicken with salt, pepper, and garlic powder for six hours . Shred the chicken like pulled pork .
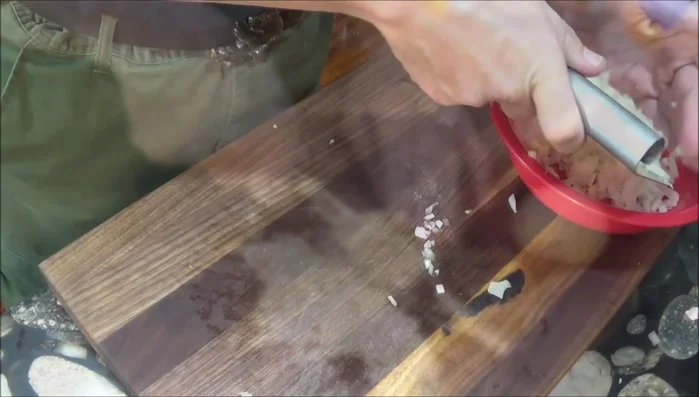
- Chop onion and garlic . Strain leftover liquid from the chicken .
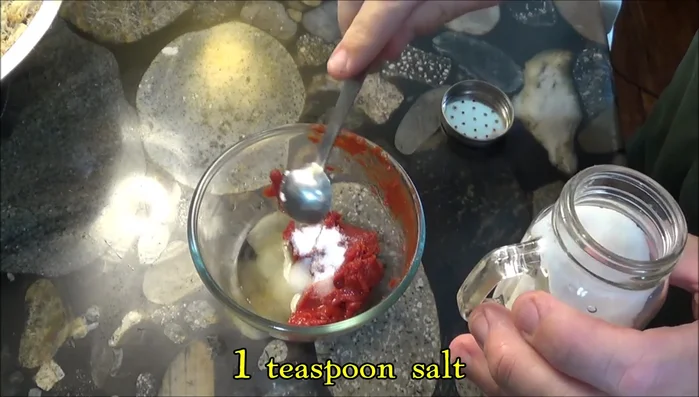
- Prepare barbecue sauce with tomato paste, salt, pepper, and cumin .
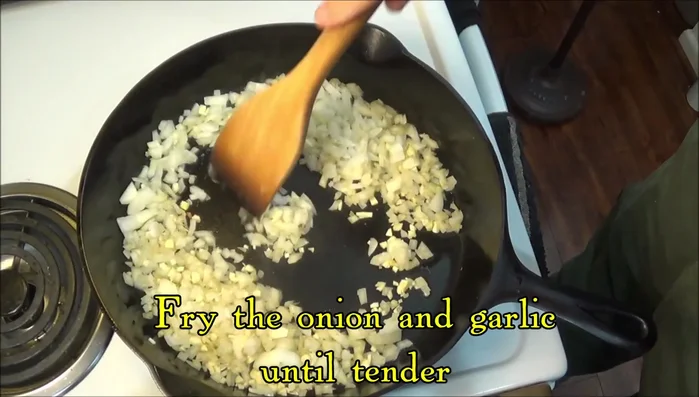
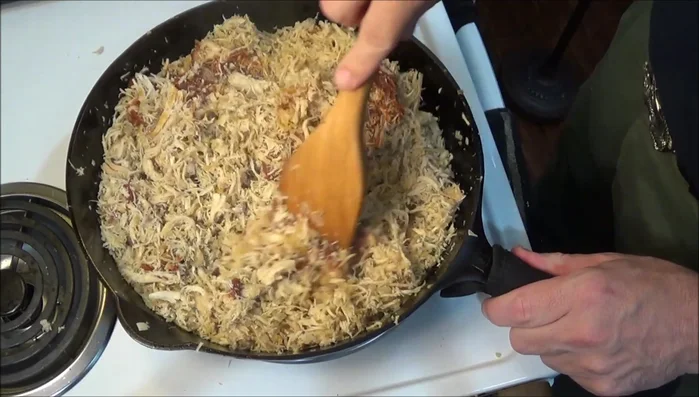
- Fry onions and garlic in a cast iron skillet until tender . Add shredded chicken and mix .
- Add sauce and parsley to the chicken mixture; stir-fry until chicken is cooked .
Step 2. Make and Prepare the Dough
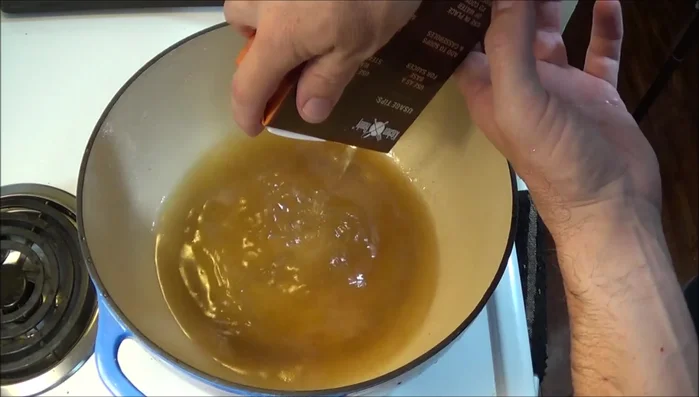
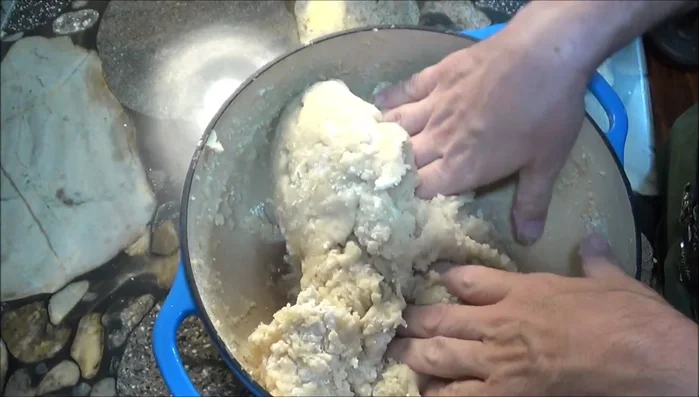
- Bring 6 cups of chicken broth to a boil in a cast iron pot . Stir in 6 cups of flour until a thick dough forms . Let cool for an hour .
- Knead the dough . Wrap portions of the dough around the chicken mixture, shaping into pear or drumstick forms .
Step 3. Shape, Bread, and Fry the Coxinha
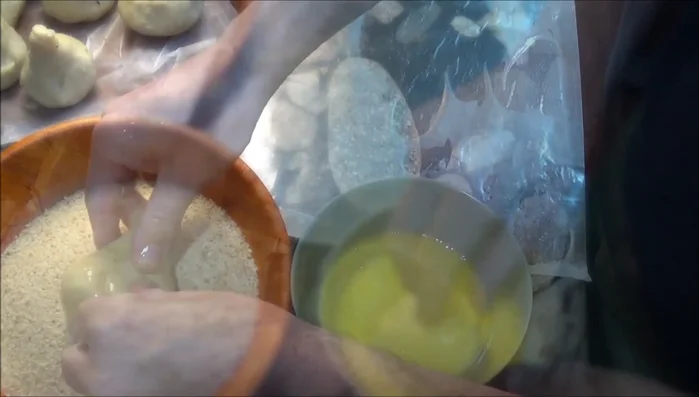
- Dip in beaten eggs, then coat with breadcrumbs .
- Deep fry in hot oil (about 350°F or hotter) for 3-4 minutes, until golden brown .

Step 4. Serve
- Serve and enjoy!

Read more: Crispy Sicilian Panelle: Chickpea Fritter Recipe
Tips
- Slow cooking the chicken adds more flavor .
- The dough is surprisingly easy to handle .
- Heat the oil hotter than 350°F for better frying results .
Nutrition
- Calories: approximately 600-800
- Fat: 30-45g
- Carbs: 50-70g
- Protein: 25-35g
FAQs
1. Can I make the coxinha dough ahead of time?
Yes! The dough can be made a day or two in advance and stored in the refrigerator, making preparation easier.
2. What's the best way to prevent the coxinha from becoming greasy?
Ensure your oil is at the correct temperature (around 350°F/175°C) and don't overcrowd the pan. Fry in batches for even cooking and crispier results.
3. Can I freeze cooked coxinha?
Yes! Once cooled completely, store them in an airtight container in the freezer for up to 3 months. Reheat in a preheated oven or air fryer until warmed through and crispy.
So there you have it – your very own batch of authentic Brazilian Coxinha! With a little patience and these simple steps, you've mastered the art of creating this delicious and iconic snack. Now, enjoy the fruits of your labor and impress your friends and family with these crispy, flavorful chicken croquettes.